Showing posts with label Terrain. Show all posts

Monday, August 31, 2020

What's on the Workbench.

 Hi All,

I'm sorry for the lack of posting. Things have been really busy both in hobby and real life, but blogging and keeping up with blogs has really fallen by the wayside.

My latest gamer ADD thing are these Corvus Games Terrain buildings.


These are the thingiverse freebies of the upcoming Isolation Protocol Kickstarter. They use the Waylayer system and I think they look great.


This is the Sector Corvus Prime Openlock freebie from thingiverse. It got me to buy the whole Sector Corvus Prime Bundle. So you'll be seeing that soon I hope.


And this is the Sector Corvus Prime Warlayer style building. Ignore the tile on the bottom, I had a clog that caused a print failure.

So I'm jumping around printing this and some fantasy streets for a Mordheim board. I also need to get on printing the Mortis Vallis Kickstarter, but I'm fixated on printing some sci fi stuff and getting it on the table.

Got some stuff in the pipeline, so stay tuned.

Tuesday, November 13, 2018

Terrain Tuesday 8 - Monolith quick build

Hi All,

I got back from Monolithcon last night and thought I'd fill you in on how I built the Monoliths this year. As you may remember I built some for the guys last year. This year we had two new people, so I built them again with one new thing.

Let's take a look.


I started with some pieces of styrofoam that I had saved from some packaging.  I cut them 4" tall.


They are about 2.25" wide and .75" thick


Next I used .25" foam core for the base. It's not the best basing material, but I have a bunch of old foam core on hand. I also want this to be light and fairly cheap, so I'm keeping it to what I have on hand. I cut it 4" long.


I cut it about 2.5" wide.


I then cut another layer 3" long,


and 1.5" wide.


I beveled the edges and rounded the corners of all the foam core with a 9mm snap blade cutter.


I then cut tooth picks to a length I wanted with the wire cutter on a pair of pliers. A touch overkill, but it worked. I lost one piece when it bounced somewhere after cutting, so be careful.


Next I punctured holes completely through the top piece and into the top of the bottom piece. You can do it with the tooth pick, but it's easier to do with a metal object. Just be careful not to stab yourself in the hand trying to push through the paper.


Looks like I forgot to show, but put the tooth picks through the top layer with the points up and the cut part sticking through. Those cut ends will stick into the holes in the top of the bottom layer. Then the styrofoam will be stuck down onto the tooth pick points until it is flush with the top layer of foam core. All of this will be stuck together with PVA glue. I used Aileen's Tacky glue.


After I gave that a chance to dry I covered the base in spackle as well as a couple of dents and chips in the styrofoam. The spackle was lightly sanded after drying and then I did my normal ground work. In my case that means spots of natural sand texture gel and spots of PVA with a mix of sand and different sizes of railroad ballast.


The next step, I again forgot to photograph, was a layer of Hotwire Foam Factory Foam Coat on the styrofoam. Last year I used only mod podge to seal and harden the foam before painting. I bought the Foam Coat for use on my Mighty Fortress and I wanted to try it out on this. I did a 3-1, powder to water, ratio and it was a little hard to brush on at that thickness. I also learned, and was later confirmed by Bulldog Lopez, that Foam Coat only sticks to itself and Styrofoam. Nothing else. So don't use spackle to fill your styrofoam.

Anyway the Foam Coat does what it says on the tin. Makes it hard and sandable. I then painted everything black and then drybrushed on Charcoal, Rain Grey and Drizzle Grey. The last picture looks a little weird because I edited it so you could see the surface of the Monoliths better.

An easy project that I did while waiting for other things to dry. Any tips you want to share or questions you have, please leave a comment.

Thanks.

Also a welcome to Miguel Guillermo. I think he may go by the handle Skully. If you have a blog please let me know.

Wednesday, August 29, 2018

Umber Hulks and assorted terrain projects

Hi All,

I wanted to start today's post by welcoming Remco to the blog. I usually leave the welcomes for last and almost always forget. Your name is very familiar, but I can't seem to think of your blog. Blogger profiles don't seem to include that any more.

On to the projects.


Finally broke out those Nozulr's Umber Hulks I ordered from miniature market. I'm going to paint them up for the Ambull Safari. Still need to work out some kinks in the scenario.


While I was photographing the Umber Hulks, this cardboard river section looked back at me accusingly. You may recall I had started these back circa 1990 and then restarted them a relatively short while ago. Gamer ADD is a struggle.


Last night my son and I were looking at the WFB 3rd Ed rule book and Slaves to Darkness. He stopped on the Mighty Fortress picture in 3rd Ed again, reminding me we are supposed to play a siege. I want to take some measurements of the pieces to try and make additional sections to match. It may be beyond my skill set.

In blogging news, you may have noticed that you stopped receiving notifications for comments to your own blog. This apparently started near the end of June. This morning I received an email from noreply+blogger asking me if I wanted to subscribe to comment notification or unsubcribe to my own blog. I looked it up in support and it appears legit. I checked my email settings and my gmail account was listed to get blog comment updates, so I'm not sure why it took this long to ask me if I wanted to continue my subscription. Just an FYI.

Happy Hobbying!

Wednesday, June 27, 2018

Terrain Tuesday 7 - I know it's Wednesday

Hi All,

I took the pictures yesterday, but then forgot to actually write the post. Terrain fell to the back burner as I frantically tried to finish the Bretonnians. Since coming back from Kublacon and vacation I have only managed to shave some mold lines and sprue connection points of the Newcromunda bulkheads.

Here's some photos.


Somehow my wife hasn't given me an ultimatum to get this thing out of the family room. There is still a lot of work left to be done.


Scraped bulkheads down to the left. Bulkheads and barricades left to go on top.


Lastly, for Father's Day, I bought myself a bag of tree armatures. 21 trees is not enough.

So there you have it. As usual I am very scattered and not putting in time like I should. I need to do what I tell my children to do. A little work every day is better than a ton of work at infrequent intervals. But my parenting style is to hold myself up as an example of how one shouldn't do things.

Happy hobbying.

Saturday, June 16, 2018

Paint Table Saturday 241 - Necromunda terrain

Hi All,

Not much to report on the actual hobby front. I haven't gotten back into a groove since returning from vacation. So the hobby has fallen on the back burner a tad.

I did manage to get all the Bulkheads, Doors and barricades from the new Necromunda terrain boxes cut off the sprue.


I'm having a little bit of indecision about how to paint them. I kind of want to do rust, but then I've really been wanting to do some verdigris. Maybe I can spot do it on the hatches or something.

I also need to print out some suitable Necromunda posters and come up with some graffiti.

I also finally went to check out Funkatronic Rex. I bought the Sector Imperialis Objectives while I was there. Not a ton of tabletop wargaming space, but the owner seemed nice and it might be a way to meet some people and have some room to set up a game to play with my son.

Junior Olympic State Championships is this weekend. More just to keep in shape for USATF Nationals than planning to go on to JO Regionals. Top 4 qualify, but he hates running at altitude and the Regionals will be in Colorado.

Thanks for looking.

Saturday, May 12, 2018

Paint Table Saturday 236 - Those trees and Camp Followers

Hi All,

Still working on cleaning up the hobby lair and trying to finish up some things so I can take my final army pictures for the Old World Army Challenge. If you haven't already you should really check it out.


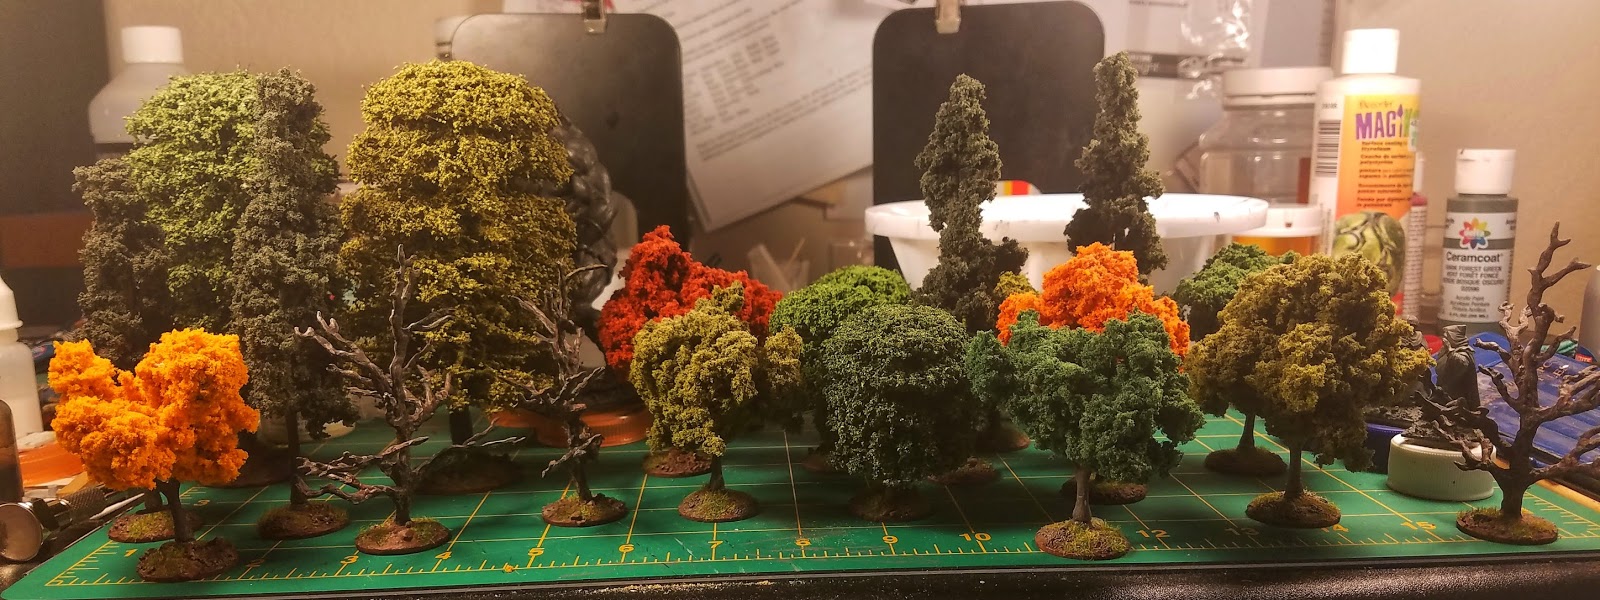
All the tree bases are finished. I just need to put foliage on the three bare trees and then spray them with hairspray or something. The clump foliage ones are shedding pretty bad.


I also finally started blocking in colors on the peasants and monk altar guards. The monks are wearing funky ceremonial robes in the red and blue of Monfel. Mongeaux, on the right is getting the fair skin tone. Blanche Neige will be getting the rosy skin tone when I unbury it.

That's all for now.

Thanks for looking.

Saturday, May 5, 2018

Paint Table Saturday 235 - Trees and Baggage

Hi All,

A quick one before we rush out the door to go see Infinity Wars.


The trees just need flock and static grass on their bases and the metal ones need some foliage.


I started building my wagon out of balsa. I want to use Bamboo skewers for posts and axles, but can't find my bag of them. It's annoying.


Here's a general layout with the plaster cast baggage in the background. I'm probably going to clip the horses off their tabs and pin them to the base. I can't decide if I'm going to base the baggage, glue the pieces together or leave them as individual pieces. I like the idea of being able to put figures or other stuff in the back.

Oh and the teachers strike is over. We went back to school Friday and will not have to extend the school year.

Thanks for looking.

Tuesday, April 24, 2018

Terrain Tuesday 6 - One Tile at a Time

Hi All,

The terrain builds have ground to a very slow pace as I'm trying to finish up the Old World Army Challenge. You should check it out if you haven't already. There is lots of great stuff and the participants will be posting up their finished army shots in the coming month.

But I did manage to tile the Stable Barn.


I still need to stucco the sides, finish the forge and forge roof. I thought I had some DAS, but I found some Fimo for doing the chimneys. Maybe I have DAS somewhere.


Seeing Blue finish up some trees got me thinking about my sad little forest. I'll try to bang these out as well. For the army I just have to scratch build a wagon and paint the final three camp followers. I would love to paint up a War Altar, but I can't seem to find the Monk figures I know I have somewhere.

The teachers strike here has added a lot of uncertainty and anxiety into the mix for me, so we'll see what happens.

I'd also like to welcome Paul to the blog. Let me know if you have a blog, it's not in your profile.

Thanks for looking and commenting.

Tuesday, April 17, 2018

Terrain Tuesday 5 - Coaching Inn, again

Hi All,

Not super productive lately, but I have done a little more work on the inn and stables. Mostly in the evenings while we watch tv.


So I finished the roof and added leading to the windows of the inn. Yo can see I added a chimney too, I just need to clad it in DAS and sculpt the stone work.


This is the stuff I'm using for the window leading. I thought I was being original, but I think they painted a lattice in the windows in the original. A good option if you didn't buy this stuff already.


I started tiling the stable roof. You may have noticed a few issues with the roof cap on the inn. The double wide tiles didn't seem to look right, so I ended up trimming a few of them down. For capping the walls the double is definitely too big, so I'm going to score a single width to make a peaked tile for it. Still obviously need to texture all the walls. The forge roof seems to be too large as well. I think I'm going to cut the overhangs flush with the cutouts. I'm not sure what went wrong there, but I cut everything out 20 years ago so I'm not sure what's up.

Thanks for looking.

Saturday, April 14, 2018

Paint Table Saturday 232 - Very little progress

Hi All,

This week seemed to be filled with everything but hobby time. My son ran an amazing 3000m this morning and may have qualified for the National meet later this Summer. I'll know for sure tomorrow.


I mostly painted the horse flesh and underneath the caparisons, so it doesn't look like much has happened.


I added a chimney, finished tiling the roof, and then put some active mesh in the windows to act as window leading. This is not in the original build instructions, I just thought it would look nice.

I also received my foam coat from Hotwire Foam Factory to try and put a protective coating on my Mighty Fortress.

That's all for now.

Happy Hobbying!

Tuesday, March 27, 2018

Terrain Tuesday 4 - Still Coaching Inn

Hi All,

Not a whole lot done this week. Somehow I am doing a lot of fiddling but it doesn't seem like a lot of progress is being made.

Here's what we have so far.


In this photo I'm trying to show you how I'm taking care of the valleys in the roof.


Here are the strips I put on to true up the first row of tiles.


Closeup of the valley tiles. I just cut some relatively square tiles on the diagonal and scored it and folded it slightly before gluing.


Mostly done with the roof. I stopped here because I almost forgot about the chimney.

In other news, I've been working on a photo gallery for finished projects. It took me awhile to find a good script for the html and css to get the look I wanted. I almost finished it this morning and then switched to Compose mode from HTML to check on how to code a header tag in blogger and it totally ruined it. Going back and copying and pasting the HTML into a new page could not save it. I have only found one reference to this problem, but not why it happens or how to fix it. So you'll have to wait for the gallery and the how to post.

Thanks for looking.

Tuesday, March 20, 2018

Terrain Tuesday 3 - Coaching Inn and Stables

Hi All,

This last week I've been working on the Coaching Inn and Stables from White Dwarf 143. Since I still can't seem to locate my physical White Dwarf magazines I was able to find the terrain articles and a repository of a magazines in pdf form out in the wilds of the internet. Let your conscience be your guide.


I had built the majority of this model back around the same time as the Barn and gotten slightly farther in that I had managed to glue the base roof pieces on top. As you can see my angles don't quite line up.


After doing the tall roof section I realized that it, and the Barn roof, have an issue with the first course of tiles. So I've decided to cut a thin, 1 - 2 mm strip, to put along the bottom edge to get the tiles to look right. The other challenge with this roof is the valleys. I looked at some pictures of actual flat tiled roofs and I think I understand how to do it.

I want to say that in the past I used Super Sculpy to make the rock for the chimneys on the Cottages. The article says to use DAS and I actually have some, so I will be giving that a whirl. One thing I may try is making a tealight forge. I saw an example in one of Tony Harwood's guides. "Models for Wargamers: Dampfpanzerwagon Guide No. 3" A link to Tony's blog here.


I need to have a think about how I'm going to do it. I want to do things a little differently than as shown. Probably stupid. I t wouldn't be the first time.

I'm also intending to deviate from the original build article and use some of this active mesh to simulate window leading.

Lastly, since I am focused on my Bretonnians at the moment, I thought I would give the Inn a French name. I scoured the internet for fantasy Inn names and came up with a short list. The one that seemed the most fun, without having to cringe if ladies or small children were present, was The Clumsy Troubadour. So Le Troubadour Maladroit it is.


On a final note. I finally reopened my Mighty Fortress. I'll be working on that semi simultaneously. I've been having trouble finding info on how it was done in the past, I did find a few interesting articles on what people did a few years ago with some old sets. I'll share that in a future post.

Thanks for looking.

Sunday, March 18, 2018

Paint Table Saturday 228 - Brets, Random Fantasy and Coaching Inn

Hi All,

I know, it's Sunday, but I was busy with track and Corn Beef eating yesterday.


Important note. This photo was taken on my phone and edited on my phone with Snapseed. Airbornegrove recommended it and so far I like it a lot. I haven't done any of the tutorials, just started playing with it and I did this photo and the silly one of me licking the Warhammer Siege book with it. You can get it on the Play Store for Android and I believe there is an Iphone App as well.

The table is a flurry of activity. I'm tried to ride the manic wave before the ultimate depressive crash hits.

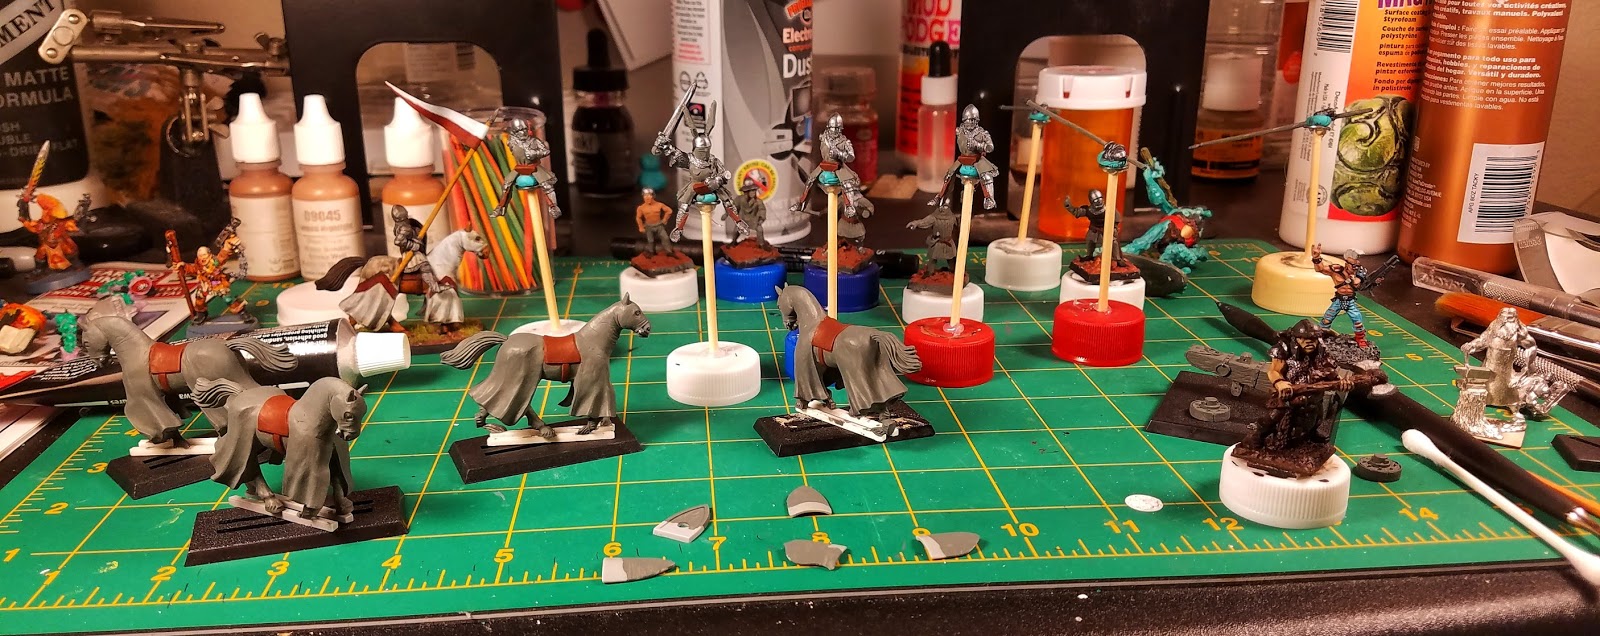
We have here the Bretonnian Knights lead by their Lord, The Ordonnance plus two laborers whom may be added to a baggage train next month, or included this month with no points value. Dahn Alt Rump is there because I was trying to remind myself of the paint scheme to use on those Foundry RT figures that are off table. I have since retconned him. I said he was part of the Anarcho Squad, but now they are Team Terra: Galactic Police! Sung to the tune of the Team America theme song, of course.

I also have a Reaper Blacksmith and an Alternative Armies Halfling Cook in bare metal there. Plus I found old Gunther there with his flesh done and decided to try and get him finished. I proceeded to slop some paint on his flesh, so will see if I can remember how I did it. I think it was a flesh tone with some green mixed in. A half orc recipe if you will.

To the left in back are some Necromunda figures I bought from a guy in Germany. The paint jobs are actually pretty nice, co I may just base them and maybe add a wash. I try not to strip and repaint figures if I like the way they were painted. Those have been few and far between though. I also refuse to repaint the majority of my 1990's painted figures. I think it's important to see where you came from and, if I'm honest, my painting is so slow I can't afford to be repainting models.


I also started tiling the roof to the Coaching Inn. I'm flailing about trying to finish things for Monday, and so may not finish anything. One thing I've noticed on this is that the tiles sit funny on that very first run. I will be adding a thin strip to the edge to give them the same tilt as the rest of the roof.

Any way, that's it for now.

Happy Hobbying.

Tuesday, March 13, 2018

Terrain Tuesday 2 - Finished Barn and build log

Hi All,

Well in the first installment I showed you some river sections and the Wargames Terrain book. I then promptly finished building this barn from a White Dwarf article.


I had started building this back sometime around 1990 and had carried it around with me between 4 states and several house/ apartment moves. I'm not sure where my White Dwarf issues are but I found a copy of the Barn article here. According to DJK's Fantasy World, the barn was in Issue 140. He also lists other projects, but seems to be missing the cottage and Inn and stables issues.

Anyway on to the build.


So here we go. A project started in the early 90's. Why I stopped here and never finished it I can't really be certain.


Printed copy of the original article. I wanted to refresh my memory on the construction of the roof and see what colors were used to paint it. On thing that became immediately obvious was that the print out of the template was smaller than my actual building. I vaguely remember something about enlarging the templates from the Cottage article, but I could find no evidence for that in this article.


So I measured the actual model and brought out my era bag of scrap terrain materials. In addition to carting around the models, I had also carted around a garbage bag filled with foam core, construction paper, mat board and balsa wood.


I briefly equivocated about making the interior playable, but decided this building had been left unbuilt for too long and had not been put together for interior play.


Again from memory I seemed to recall using wood glue to put it together. This was a more recent purchase. The set time was not fast enough and I couldn't figure out a way to weigh down the roof bits so they would stick correctly.


Hot glue gun to the rescue. It was a little tricky, and I did eventually have to carve out some overage with an exacto knife.


I found, before I glued it down, that my lean to roof was a tad too large. So I excised 5mm.


Roof substructure on!


My cellphone decided not to rotate this picture, but I cut out a chunk of card and made 1cm wide lines on it. I then cut the strips with a snap blade box cutter and left a couple of 2cm wide strips for the roof crown. The article gives different widths. I forget what they are, but I didn't like them.


I then started hand cutting shingles with said box cutter. You can use the strips with notches cut in them to represent tiles or you can cut individual tiles. They did the latter in the article and I had done it previously on the cottage.


I quickly used up my first batch of tiles. By the way, gluing them on is a great project for sitting and watching tv with the family. You know, so they don't think you're trying to avoid them.


We're not going to run out of tiles this time.


Breaking out the paper cutter for full production mode. My cuts aren't quite as accurate, but it goes way faster.


Et viola! Remember to leave a couple of double wide strips. I got over zealous and only left myself one.


I also tried my tin snips to cut the individual tiles. Works a treat. Much faster and I didn't have any problem with tearing like I did on occasion with the box cutter.


Always remember the old adage, "measure twice, cut once." My barn door was a hair too small.


Roof on, door still too small.


My collection of aged balsa. I save everything.


Fixed Barn door with planks etched in and cross planks. I just used a sculpting tool I had handy to gouge some lines in the balsa sheet. I should also add that I used Aileen's Tacky glue to put the doors on. It lives up to it's name and just sticks things in place better from the get go. I did have to use a toothpick to clean up some overage though.


The lean to door. I should have used card or thinner balsa for the cross bracing. Oh well. You can also see the ground work I added. On to paint.


Black base coat. I brushed it on and had some trouble working the paint into all the nooks and crannies.


Paints used for the body of the barn. The original article said to dry brush with Bestial Brown, Elf Grey, and Skull White. I don't think I have any of those colors left so I had to improvise. I used Nutmeg for Bestial Brown, Rain Grey for Elf Grey (which was later changed to Codex Grey? I couldn't seem to find an example on the internet.) And Drizzle Grey for Skull White. I tend to use a very light grey in place of white.


For the roof you were supposed to do a dry brush of Moody Blue followed by an Enchanted Blue highlight. I did successive dry brushes of Midnight, Navy Blue and Blue Heaven


For the ground work my normal Earth Brown, Territorial Beige, Desert Sand combo.

I then added flock and static grass after varnishing the whole thing. Done.

I hope this inspires you to pull out an old abandoned project or maybe try your hand at one of these classic designs.

Happy building and painting!