Saturday, June 18, 2022

Figuring out 3d mapping some more

 Hi All,

  Just a quick one. I've been noodling around with Blender more, trying to understand how the various nodes work and get them to achieve the look I'm going for on my own project.


Here is my erstwhile map configured using Sam Bowman's procedural terrain technique but using my height map to displace. The water needs work still and I'm trying out different ideas for how to mask out the rivers better.


One thing I finally figured out is how to view the effect of the Color Ramp by adding a viewer node. Shift+Ctrl+Left Click on the node you want to view and it will insert a viewer node for you. Now I can see where the mountains are getting their stone texture in white, for instance.


I did get a little farther with the Toby Rawal version, but I was having some difficulties with the Color Ramps and decided to go to Sam's method. I also really dislike how I did the water here.

Anyway, in general I like the look of the Bowman method better. 

Hobby on.


Thursday, June 9, 2022

Mapping progress using Photoshop, Wilbur and Blender.

 Hi All,

I've had a few things going on, but not a lot of time for the blog. After the school year ended for us, Aidan and I went to Kublacon and had a good time. At some point I'll do a overview report of that.

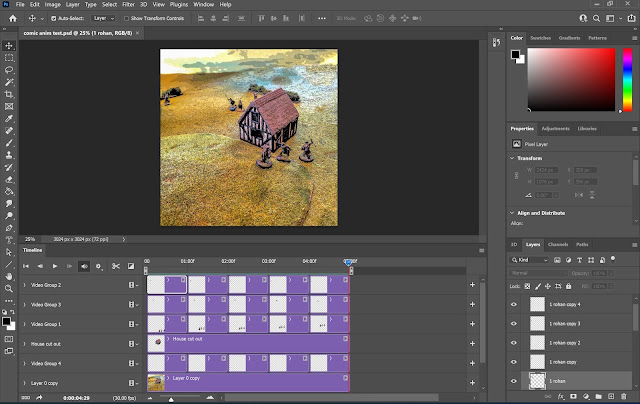
I'm still sitting on our last local game of MESBG for a video/comic report and I intend to do some for the games we played at Kublacon. I'm a tad behind on doing track photos and band photos, but I should have more time soon.

In between honey do projects for my in-laws I've gotten back to working on my map.

It turns out I've gone back to some tutorials I found years ago and tried some things out.

First I roughly followed this PDF to make a height field in Photoshop. You could just use it to make the map and be done. I, of course, made things more complicated.

Here is my completed heightfield. It took me three iterations.


I then tried to follow a tutorial for running this height map through Wilbur and it took me several tries before I understood what exactly was going on with the software. For one thing my image is 7200 x 5400 and that puts a lot of stress on my Surface Tablet when running things in Wilbur. Particularly Incise Flow Erosion. That aforementioned PDF talks about how to process the image through Wilbur, but I found a more in detail one that helps with placing rivers and lakes where you want them, here.

In it they discuss making masks and there is a very detailed PDF link included for the Wilbur operations used.

This is the Height Map I exported from Wilbur.


Some of my forced river valleys are a tad clunky, but you get the overall concept.

I've then been trying to work out how to use Toby Rawal's process from this video.

This is what I have so far.


Obviously a lot of work left to do. I mostly spent time setting up the Node tree to get all of my Textures and mixes in, but the mix is acting a tad bizarre. I don't totally care for my water at the moment and The sand should obviously only be on the shore line.

I've also played around with Terresculptor, but I haven't learned how to use it well yet. It does look promising though.

You can get the latest version of Wilbur (1.92 I think) here. Supposedly if you have Fracterra from Profantasy that is the commercial version of Wilbur.

Anyway, I hope you are living your best hobby life. Let me know if you have questions or want to share how you make maps.

Cheers.

Sunday, May 15, 2022

Blender Procedural River Valley

 Hi All,

Still around, just busy with other things and hadn't realized how long I'd abandoned the blog. In the midst of slogging through Track Photos I've been playing around with Blender and following along with some tutorials.


This one was pretty fun and informative.


I'm trying different things for the water because I'm not sold on the glass shader.

I got interested in using blender to help me with making effects and backgrounds for my videos and then remembered that I could potentially use it for map making. So I've been boot strapping that. 

It's a little wonky on my Surface Pro, but it works. If I find things too limited I might upgrade to a dedicated computer.

Thanks for looking, and happy hobbying.

Saturday, February 12, 2022

Testing how to add movement to my comic book photos

 Hi All,

One of the benefits of having trouble sleeping is that you sometimes have a lot of time to watch videos and learn how to do things.

It occurred to me that I should see how I could animate my comic videos more. So I watched a bunch of youtube videos on animation, rotoscoping etc.


It turns out that there is a time line view for photoshop and your layers can become video segments. My daughter, the animation major, was all like "duh, dad!"

Anyway the gist of it is this. cut out your subjects and put them on their own layers. Do a content aware fill to get a subject free background, and clean up as necessary. Then you can make copies and move them and resize them and drag them into video groups.

This is obviously clunky, I'm doing a position change per second in a 5 second video, so it's very basic. I just wanted to see if I could actually do it. It tried another method converting things into 3D objects,  but I couldn't get it to work for some reason. I'm also not really understanding how to utilize key frames.

Here's the video from Youtube.


Enjoy.

Saturday, February 5, 2022

Camera Raw in Photoshop for tweaking comic photos

 Hi All,

I had one of those "Doh!" moments the other day.

Why wasn't I using Camera Raw to adjust image exposure in these cellphone shots?

As per usual I think I had done things differently in the past and as I got more involved in making comics and switching from DSLR to cellphone I lost some of the technique along the way.

When using DSLR I had always adjusted the RAW images in Lightroom and then exported as JPEG. When I first got into using the Cellphone again I used Snapseed to do something similar. But honestly it was a little bit of a pain doing that on the phone.

I knew about Camera Raw in Photoshop but I didn't remember how to access it. I don't use Adobe Bridge to manage my photos.

So I Googled it.


So we open up our same example photo.


Then Shift+Ctrl+A to open Camera Raw. You now have a Lightroom like menu to make adjustments.


Then I just apply my standard base adjustments. Bring the Highlights all the way down, Pump the Shadows all the way up, and then adjust the Exposure to center the Histogram and pull the Whites and the Blacks back out.


So a big improvement. I could also pump up the saturation, but I could do that with an adjustment layer later as well.

Anyway, it's fun to remember ways to do things that you kind of forgot about.

Happy hobbying.

Monday, January 31, 2022

Dodging in Photoshop to fine tune comics

 Hi All,

Lots of things going on, not much hobby. What I did do though is start looking at techniques for restoring old photos and fine tuning exposure issues in Photoshop.

The video instructions that I found helpful were this one by Karl Taylor and this one by Phlearn.

I've had an issue for a long time in my comics where the figures tend to show too dark. I have known that I could do some things to fix it but hadn't really put in the effort to understand it until now.


You may remember this picture from my last comic. As you can see, the figures are pretty dark and muddy looking. They don't read well.

So let's open it back up in Photoshop and see if we can fix it.


 Here I've reopened the picture and inserted it into the comic template I made. This is the base layer Smart Object being edited. You can also see that I zoomed in on our subjects, the Isengard Uruk Hai.


With your layer selected, add a Curves adjustment layer.


Pull the Highlights up on the curve. You can see how everything is brighter now.


With the Curves Mask selected press Ctrl+I to invert the mask. Thus removing the Curves effect.


Take you paintbrush and paint White over the areas where you want the Curves effect. I did it a little sloppily here just to give you an idea. I used a soft brush with 50% flow. Building the effect up with a lower flow brush might be better. You can also change the opacity and blend mode of the adjustment layer to further tweak the effect.


Before.


After.

So you see, it just helps bring back detail that got lost and I think makes a big improvement. I'm not sure what took me so long to address this issue, oh well.

I hope you learned something useful.

Hobby your way.

Thursday, January 20, 2022

Dungeon (2014) - New Year's Eve Game

 Hi All,

As usual I am running around like a chicken with its head cut off. I thought I was in a space between Cross Country and Track Seasons and could get my hobby together. Turns out I got myself elected to the Band Booster Board, say that five times fast, and am more or less designated photographer for the band moving forward.

I attended my first HS basketball game this week and it was pretty good. I forgot how fun it can be to watch a game played by athletes who know what they are doing. I've been watching too many years of really horrible elementary school lunch recess basketball.

Anyway, I just wanted to share with you a few pictures of a game we played of the 2014 reboot of Dungeon put out by Wizards of the Coast. We had had the game for years, but apparently had never opened the box.

It is pretty much the same game with updated art and they flip flopped you wanting to roll high for everything instead of wanting to roll low for some things.

The art is nicely updated and some of the tokens have been streamlined. For instance you now have a token to show whether your magic sword is +1 or +2.

They also updated the classes to be more in line with current D&D. You now have Rogue, Cleric, Fighter and Wizard. No more Elf as a class. They have also provided male and female playing pieces for each class. I thought it was a nice touch.


My wife chose to play the Rogue. I took Cleric, and the kids both wanted to be a Wizard. In the new game mechanic you roll to determine how many spells you start out with and then you pick cards for the spells you want. There are enough for two Wizards, it turns out. There is also a mechanic for replenishing d6 spells if the Wizard goes back to start.


We actually read the rules for once and more or less followed the suggested levels to go to for each class. The two Wizards went the same direction because they both need the big money.


The Wizards got bogged down in the 6th level. There was a Red Dragon in that chamber leading to most of the rooms. That is my wife in the Great Hall having to respawn after being killed while I win the game after plundering half of the 2nd and 3rd levels while making a daring escape back to the Great Hall through the 4th level.

All in all the game still holds up. It's frustrating, but fun.

Hope you are getting in games with friends and family.