I have been thinking about photography, among other things, again. While I was in the middle of thinking about this r.a.e. gingerbhoy of
Gingerbhoy's Painting Projects was talking about how he felt he was losing painting competitions because his pictures weren't as good as his opponents. I'm paraphrasing, but you get the idea. This is a big topic, and I don't pretend to have all the answers. But I do have some opinions.
I think I'll try to do a series and see what some of the answers are. But for this one I'll talk about what equipment I use. It's a bit narcissistic, but so is blogging in general.
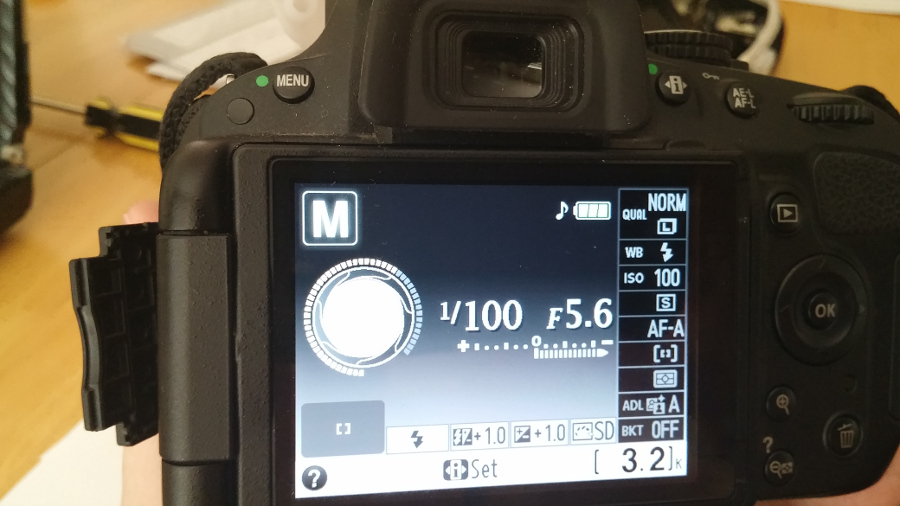
I have been using a Nikon D5100 for the last couple of years for most of my photography and have been fairly pleased with the results. I bought it on sale at Costco ( a big warehouse store in the US) and it came with a camera bag, 18-55mm and 55-300mm lenses. You can see their current deals
here. It's a lot of money, but I use the camera a lot now. Before I would carry around smaller digital cameras and never bring them out. With the big expensive camera I feel compelled to use it to justify its purchase. Although I still forget to break it out at family gatherings and social settings.
Now we could leave off there, but there are a few things that I've acquired since the initial purchase that I find useful. First, especially for shots of miniatures, you need a tripod. I have a standard one from years ago which works fine, but I recently bought a
Gorilla Pod flexible tripod. I use it to set up on the game table. I'm still working with it. I think it could be very useful, but so far I haven't done that much with its unique features. I also have a monopod. I use it for photographing outdoor sports, it really helps to get better shots when the kids are running around and you don't have a lot of time to set up the shot. I can't remember if mine was
this Dynex one, but I'm pretty sure I didn't pay a lot for it.
Second would be the flash diffuser. Lighting can always be an issue, and to be honest, I don't think I've gotten it licked yet. The diffuser I bought was recommended by Dave D
here. (In fact I could have just skipped this whole post and just sent you to Dave's post. It is essentially how I take my pictures now. But I digress.) This gadget really helps dull the harshness of the flash. One day I'll try the other colors, but i use white. I got mine from Amazon
here.
Third would be some kind of infrared remote. You can set the timer, but the remote is dead easy to use and takes away any nudging or vibration of the camera. I bought a generic one from Target
here, and it works great. Just make sure that the camera has something to focus on. The first time I tried it I think I had the object inside the cameras focal length and it refused to take the picture.
Fourth item is a good camera bag. Now the camera I bought came with a bag, so you may be thinking, why does he need another bag? Well, although serviceable, the bag isn't all that comfortable or easy to get the camera out of when you are running around historical sites. So I bought a sling bag and it's been great. I got the
Lowepro Slingshot 250W and it's been great. I will say that the single strap, although great for camera access, can be a little fatiguing when you are on a death march through the Louvre or trying to cram in a lot of site seeing in one day. One salient feature, that I haven't had to use yet, is an integral rain cover that pulls out. Great for sunny old England, although we had hardly any rain during our visit in March.
The last thing I bought, and it is totally unnecessary, was an 18-300mm lens. The stock lenses are very good, but I've been caught many times in sports or on vacation where I had the wrong lens for the job and missed the shot. My solution was a lens that could do a little of everything. I bought
this one used, again from Amazon. It is not uncommon for a lens to cost more, sometimes multiples more, than the camera body itself. So you need to get over sticker shock and sort out your price range and what you want from the lens. My hope is that I can get the closeups on the football field and then take a portrait of the team, all without having to try and do a lens change with little time and a lot of dust and dirt flying around.
So there you have it. My fancy camera gear. Next I'll look into various resources for taking good pictures of your minis. I'll try to follow that up with some examples of a setup and try to show the difference between different kinds of cameras. Lastly I may try to look at some examples of miniature photography and see if I can get the photographer to share their process.
Happy picture taking. Or is that camera shopping at this point.