Monday, June 8, 2020

Classic Plastic - RTB01 Space Marine

Hi All,

Well, I let peer pressure get the best of me again. This time a bunch of us agreed to paint a Plastic Space Marine from the RTB01 box. I suggest you read about it here. There are some truly fantastic submissions once again.

I won't totally bore you by rehashing what I wrote over there, but I will repost the pictures here.

I give you a Medic/Apothecary from the Space Ghost chapter of Marines.


My inspiration image.


I neglected to mention that I followed one of Curis Ninjabread's tutorials for painting the white armor. I used similar techniques on the rest of the colors. My black, especially, needs more work. You can find him on Patreon here for tutorials if you are so inclined. This is the first time that I followed all the way through and got a result that looks like what was intended.

Anyway, thanks for looking.
Sunday, May 31, 2020

Editing STL files - Necromunda

Hi All,

So you may or may not have seen these great Sci Fi buildings that Bulldoglopez and Axiom have been building out of old Necromunda bulkhead sections.

Now I had thought that Bulldoglopez had blogged about it, I was wrong. Axiom, however, has here. In fact, he is such a consummate gentleman he has blogged Bulldog's as well at the end. I'll wait while you read it. When you do you'll realize why I got excited about hab building.

My first issue was that I didn't have any of the old Necromunda tiles. What's a guy locked in his house with a 3d printer to do? 

First, search the term "Necromunda Bulkhead" on Thingiverse. I tried several and they had real problems with ovehangs straight out of the box. I had to figure out how to get usable prints. After failing with the split, flat on the build plate, files I figured I could cut the vertical files in Meshmixer. 


I still had to print with supports, but  it seemed to print fairly well.


Not too bad, but those supports are a pain to get out.


So back to the drawing board and fix those parallel to the build plate files. That handle had to go. it started on the third layer and just made it a nightmare to print.


It's hard to get perfect in Tinkercad but it prints flat.


Seven and a half-ish hours, not too bad. This particular print made me realize I had some more tweaking to go as the top right door piece had a void around the sides and the top on the back. Why the OP did that baffles me.


But they did print. Just a little bit of lifting on a few corners.


I also realized after this that the fill in the bottom pair was too thin. So I thickened it up a little.


Now I had been super resistant to Tinkercad because I like to have software on my computer so I can work on things offline. After a couple of friends showed me what they were doing with Tinkercad, I got over myself. Now I'm addicted to adding stuff to the bulkheads.


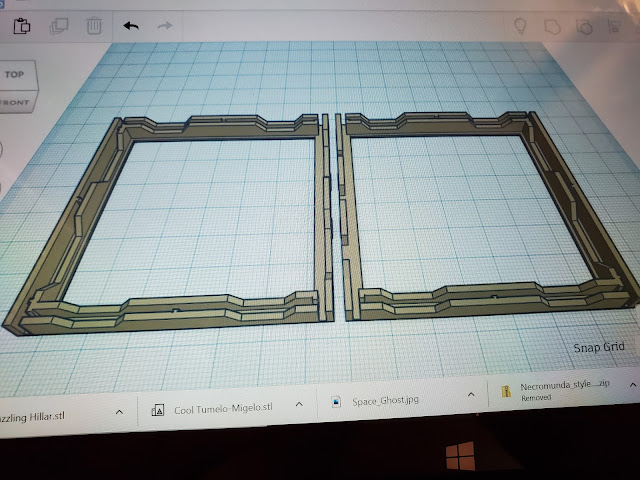
Then I remembered there were some bulkhead frames. I had to cut off the top handle on the right and some connectors between the two halves.


But I wanted to rotate the halves so that they sat on the plate like the other models, but I didn't know how to separate the parts. As you can see here, I figured it out.


A little verbose GoogleFu later.


Here's this guys video. Thanks Chaos Core Tech.

He's using an older version of Tinkercad, but you can still do what he says.

Thanks for looking, and I hope to have some habs to show you soon.


Friday, May 22, 2020

Mek Life Crises - The Quarantina Mek Off

Hi All,

I painted an actual model the other day, I think my first of the year. A bunch of us were doing our usual trash talking and it devolved into Bulldoglopez calling out Captain Crooks to build a Mek in two weeks.


I had bought this Mega-Gargant off of Blue in VT as I got excited to go to BOYL 2019 and play some Epic. Unfortunately the Mega-Gargant was considered too OP and I had to build the one I ended up using.


I primed it using the airbrush. I think I'm getting the hang of it. At some point I may graduate from priming and varnishing to actually painting with it, but not yet.


I was convinced that I had to keep this unassembled in order to paint it. I think I was mostly right, but I did have the usual problems fitting it back together once painted. Just some very minor boring out of holes and shaving away a little bit of the shoulder crane.


Anyway, thanks for looking and go check out the really cool stuff the other guys did over at the Scale Creep blog here.

Thursday, May 14, 2020

Simple SciFi Building

Hi All,

Hope that stay at home protocols have been seeing you stay well. We're in the last 5 days or so of school.

I made some "improvements" to my printer that ended up not working for me, so I reverted back except I kept my Estep calibration.

In the meantime Cura 4.6 has been released and Tom Tullis of Fat Dragon Games has released new Cura profiles for terrain and miniatures.


I've since printed the missing walls. I think I'm going to turn this into a gun shop. I'll need to print out those things from the Tycho Streets and Bazaar set.

I've really been knocking my head against how to print this building out. There are a lot of overhangs that just don't print right for me. Part of the problem was the mods I made, but I also just can't figure out the best way to print it. I may just print the basic walls and then glue scifi bits to them. We shall see.

In the meantime I've finished painting all the dungeon tiles and hope to be tricking my wife and daughter into playing AHQ with us soon. One thing that is holding me up is I feel like I need to have some good female miniatures for them to use to feel more invested. Sadly I don't have very many and certainly not very many painted up.

Anyway, I hope to post a little more regularly and get back to checking in with your blogs, I've been a bad blogger for awhile now.

Happy hobbying.

Wednesday, April 22, 2020

Boardgaming

Hi All,

One of the side effects of the covid-19 stay at home guidelines is that we've been playing a lot more games as a family.

It is also coinciding with a class my son is finishing at school called Game On!

He is assigned to play a few games each week and then write a review of sorts about them. This week is strategy week.

Here are a few of the games we've played over the last few weeks.


I played it once back in the day but never owned a copy until the re-release a few years ago. I never thought my wife and daughter would play, but I sold them on it as they would be able to gang up on me after I beat them at Risk earlier in the month. They beat me in about 6 turns. I think I yelled "Wolverines!" at least once.


I've only played this a couple of times before and never played the original. It's pretty fun. I think my son enjoyed this one because he legit beat me as the Union.


I've probably had this game since 1984 and I'm hard pressed to remember if I actually ever played this game with anybody before. I played it by myself quite a bit. My son especially likes the plastic coins.

Anybody else breaking out some classics?

Thanks for looking.

Monday, April 20, 2020

Dangerous Dungeon Delvers

Hi All,

Just a little glamour shot of a few figures I had handy and some of the dungeon tiles I printed.


I've been alternately using the airbrush or brush for priming and like them better primed black.


Many of these were varnished and used for the photo. I've been using the airbrush to varnish them. Again to learn how to use the airbrush.


Just a little shot of the production line. Current process. Base coat black. Drybrush Charcoal, Hippo Grey, Rainy Grey. Spot drybrush Burnt Sienna and Territorial Beige. Sponge on Forest Green then Slate Green. Done. All of the paints are Delta Ceramcoat except for The Black and Slate Green, which are Americana (Or Vallejo Black Primer).

Thanks for looking.

Thursday, April 9, 2020

Hobby Update: Social Distancing Style

Hi All,

I realized that it's been awhile so I thought I'd jump in and give you an update of sorts. It's been a whirlwind of ups and downs as cabin fever sets in and things seem to be not working at times.

First, here's the progress on my Worldographer map.


I know, you're probably asking yourself "isn't this the same exact map he showed last time?" Yes and no. I went for the full map being delineated by the smallest hex size I wanted to use. So each hex generated by the program is 6 miles across. All of the coastlines and rivers are done as polygons to get the shapes I wanted. You can see I've put in the border of Monfel in the upper Left area. It more or less follows the area of the hexes from the hand drawn map.

Once I get in more of the borders and settlement I can start tweaking the boundaries and terrain. For instance I need a lot more tributaries for those rivers.

I've been running into a weird issue where I seem to be overloading the program and it will tell me I'm out of memory. I can't save of export or anything. Closing and restarting seems to fix it, so I just try to save my work often.

3d Printing has been going apace. I had a lot of trouble transitioning to the glass bed. It turned out that I needed to lower my bed temperature from 50C to 40C and use glue stick to get prints that didn't come off in the middle of the print, not stick altogether or warp horribly as the layers cooled at different rates. I also adjust some parameters of when the cooling fan came on, but I think bed temp was more important. The main thing is, there is a ton of advice out there and you have to be willing to try different things to find what works for you. Just because other people say xyz works for them it may not work for you.

One of the things I did was print some upgrades for my Ender 3. I found all of them on thingiverse here.


The vent fan cover redirects the airflow so it is not going straight up at the bottom of the left side of the bed.


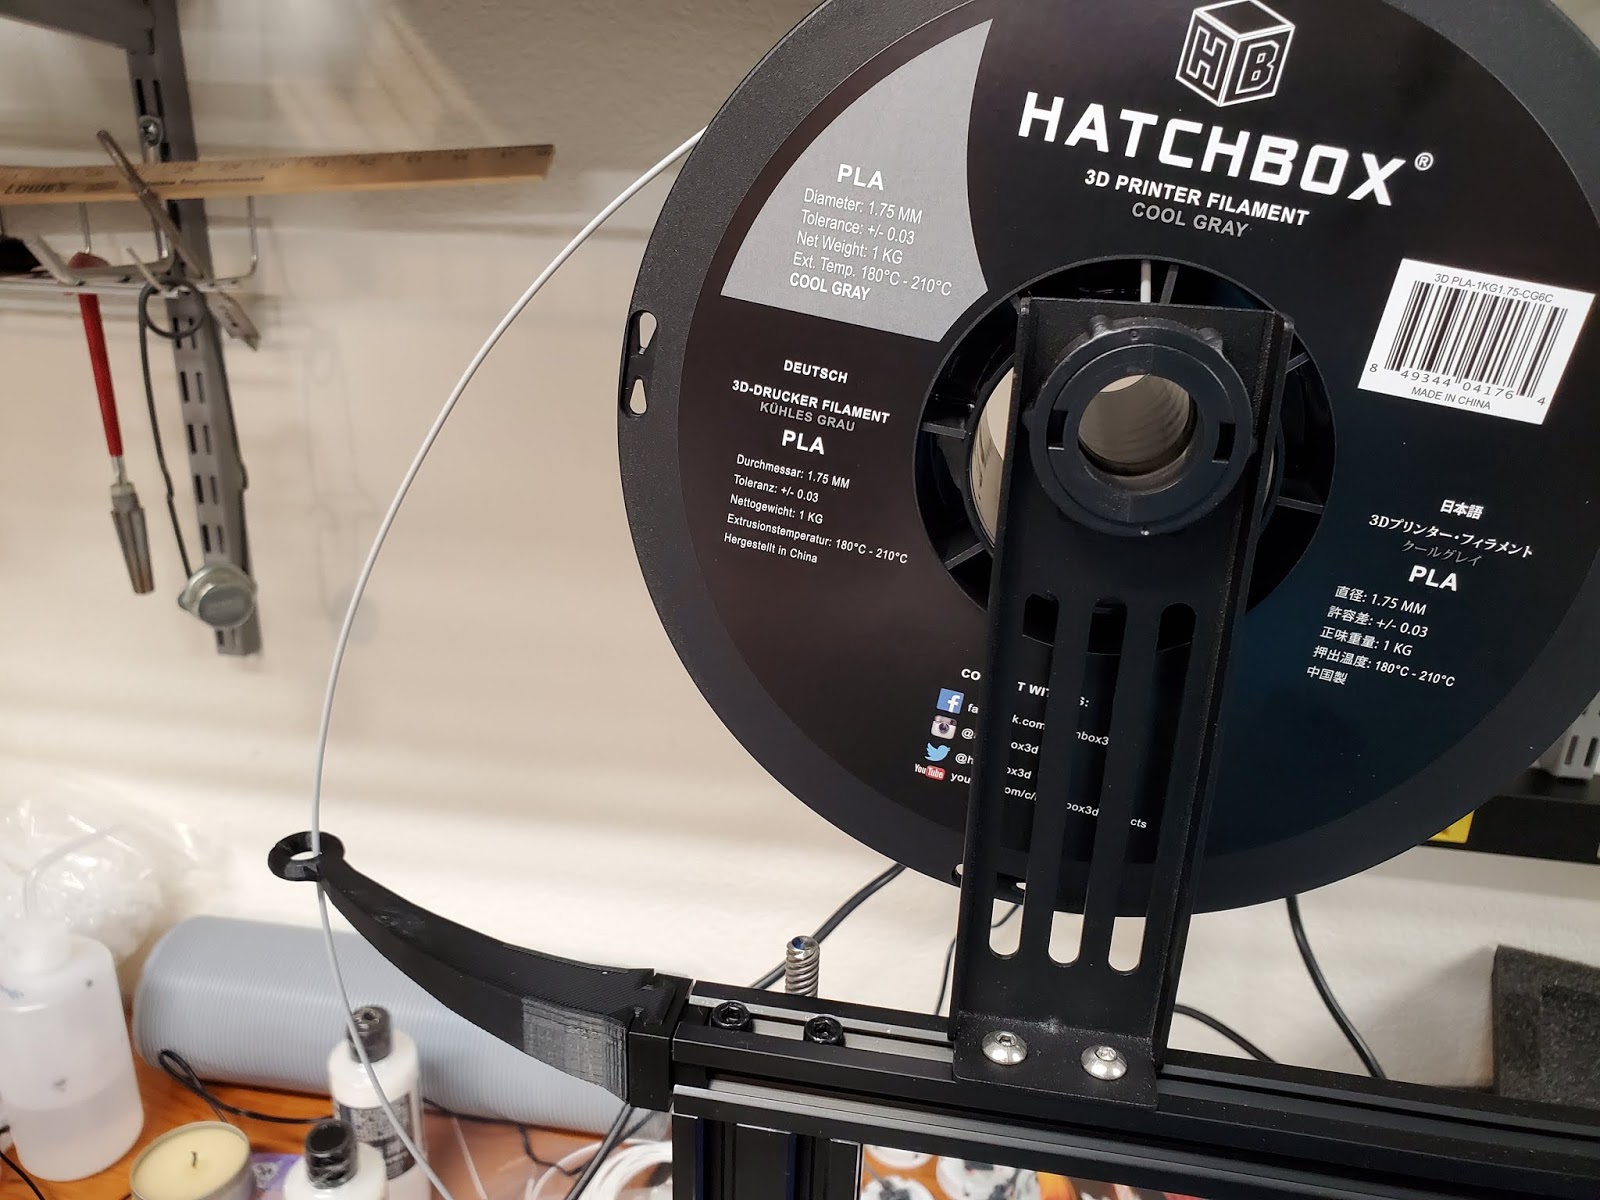
The filament guide seems to help with unspooling the filament so you are no longer pulling straight down.


I found this tool rack very helpful. As you can see, I'm sort of a slob. Now I can find all the tools when I need them. As long as I put them back in the organizer.


Lastly, I printed this filament guide. As you can see, I ran out of Black filament before printing it. Oh well. I printed it at 0.2mm, so that's why it may look a little rough. It's hard to see in the picture, but I did wear a groove in the plastic around where the filament goes into the feed. I din't see it until after I had switched to grey filament. Hopefully this guide will fix that so it doesn't continue to happen.

Hope this helps you if you're having trouble with your printing projects.

Thanks for looking and commenting.