
I wanted to start painting some checked patterns on my goblins and hadn't really done it in awhile.
I wanted to do more of a lozenge than a square. after some attempts on paper that looked like 90 degree rotated squares, I found this youtube video.
Back in the day I used my liner brush to paint the grid lines. Today I used my XS Faber & Castell pen.

Just showing the pen and figure.
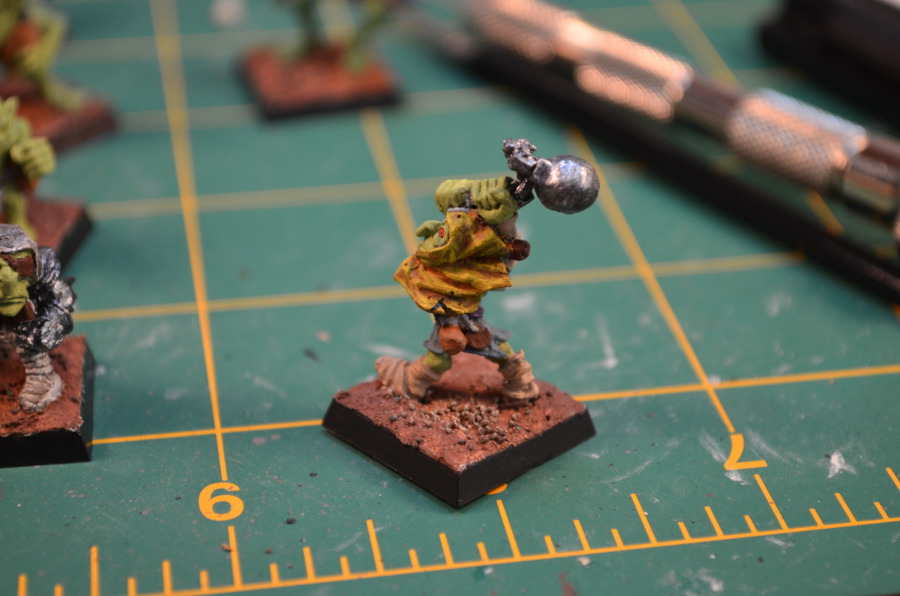
I't a little hard to make out, but I've made a little triangle with the pen in the center of the bottom of the hood.

Pick one side of the triangle and draw lines parallel to it. I started the other side a little before I remembered to take a picture.

Complete your pattern grid by drawing lines parallel to the other side of your triangle.

What I forgot to mention is that we normally start with our light color, yellow, as the base and draw our grid over that. I then filled in my dark, purple, color and do every other one.

Next go back over your yellow areas and try to fix up the shapes.

Finally you can further define each color in the pattern with a highlight color. I think were done on this pattern. I may have over done it with this last stage. I think the size is too small for my skill set at present. Or I just need new brushes because I can't get a good point anymore.
I also did a few more colors on the main gobbo unit. Need to pull my finger out. I'm running out of time.
Thanks for looking.
This isn't an "attempt", you did it!
ReplyDeleteThanks Tiny Basement. I should have made the pattern a tad larger.
DeleteGood grief man!!! I think from now on, every figure in this army needs a lozenge check pattern on them! Good luck!
ReplyDeleteNice work though Sean!
Hi Ray, thanks. I'm saving the full lozenge uniform for my 6mm army. ;)
DeleteLooks suitably checkered. Good work!
ReplyDeleteThanks Leif, it breaks down a little in ultra closeup but it's good at normal gaming distance.
DeleteThis looks most excellent to me !
ReplyDeleteThanks JB, I need to get over to your blog. I've been absent from it for too long.
DeleteThat certainly worked, looks superb!
ReplyDeleteThank you Michael.
DeleteGreat little tutorial. I think I will try it out. Thanks!
ReplyDeleteThanks Joakim. Give it a go and let me know how it works. The inclusion of the fine point marker in my hobby tools has been beneficial.
DeleteBrilliant work! You wouldn't catch me trying it, but brilliant work all the same :)
ReplyDeleteThanks Roy. As long as you stick to good size squares/ diamonds and keep it to a single figure, it's not so bad.
DeleteLooks good! Well done, and I've never done the checks with a pen, but have done eyes with one. Will have to give this a go.
ReplyDeleteHi Kaleb, yeah I learned about using the pen for eyes last winter. I thought this was another good use for the pen. Sometimes painting straight lines can be pretty hard.
DeleteCracking stuff mate! You've certainly pulled it off. I hate painting checks and avoid it like the plague.
ReplyDeleteThanks Millsy, some times you just have to paint some.
DeleteReally nice work, cracking step by step, reminding me I need to finish those Voltigeurs, darn shiny things keep pulling me off track!
ReplyDeleteThanks Stevo, it's been very hard to not pick up random figures and work on them.
Delete