
So you may or may not have seen these great Sci Fi buildings that Bulldoglopez and Axiom have been building out of old Necromunda bulkhead sections.
Now I had thought that Bulldoglopez had blogged about it, I was wrong. Axiom, however, has here. In fact, he is such a consummate gentleman he has blogged Bulldog's as well at the end. I'll wait while you read it. When you do you'll realize why I got excited about hab building.
My first issue was that I didn't have any of the old Necromunda tiles. What's a guy locked in his house with a 3d printer to do?
First, search the term "Necromunda Bulkhead" on Thingiverse. I tried several and they had real problems with ovehangs straight out of the box. I had to figure out how to get usable prints. After failing with the split, flat on the build plate, files I figured I could cut the vertical files in Meshmixer.


Not too bad, but those supports are a pain to get out.


Seven and a half-ish hours, not too bad. This particular print made me realize I had some more tweaking to go as the top right door piece had a void around the sides and the top on the back. Why the OP did that baffles me.


I also realized after this that the fill in the bottom pair was too thin. So I thickened it up a little.


Then I remembered there were some bulkhead frames. I had to cut off the top handle on the right and some connectors between the two halves.
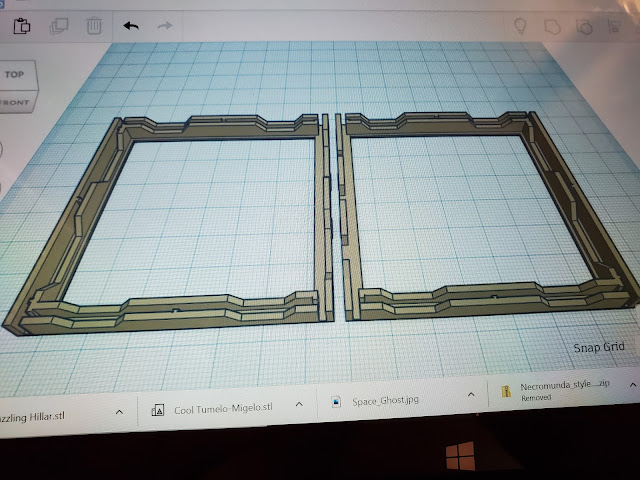
But I wanted to rotate the halves so that they sat on the plate like the other models, but I didn't know how to separate the parts. As you can see here, I figured it out.

A little verbose GoogleFu later.

Here's this guys video. Thanks Chaos Core Tech.
He's using an older version of Tinkercad, but you can still do what he says.
Thanks for looking, and I hope to have some habs to show you soon.
Always cool to people working on these printable projects. Think your in the right direction with these. Will have some really nice necro terrain at the end of it
ReplyDeleteHi Dai great to hear from you. I thought I replied already, but must not have hit publish. Thanks, I think I will finally have some fun terrain.
DeleteHey Sean!
ReplyDeleteGreat stuff, and as you know I love tinkercad. All my star trek ships were made there, but since I do not have my own printer (yet?) I have not really bothered with large stuff... your results suggest that I should be!
Sorry I have not been commenting on your blog for a while (March 16!), I have been busy with work, and just staying away from blogging in general, but I am slowly getting back into the swing of things. I read through all your posts, and am impressed with your output.
Thanks for commenting Lasgunpacker. I can't blame you, I have been terrible about commenting on peoples blogs. I really liked your ships made in tinkercad. I was being stubborn about using it, but it's really great. Honestly go for it with the designs. I can recommend getting a 3d printer, it's loads of fun and you can make some really useful stuff.
Delete