
One of the things that you may have noticed is that I've been working on a photo gallery to display all the figures I've painted over the last year. I knew there were many ways to do it and I tried a few that were hit and miss.

First I tried this one from Georgia Lou Studios seemed interesting, but all the code had been removed and the easier method didn't seem to work anymore either.
Then I tried this one from Xommise.com. It had a few problems. The {box-sizing} tag appeared to effect the boxes around the page tabs. If you follow the instructions and put the CSS inside your <skin> for your blog, it will effect the entire thing. You can put the CSS just into the post or page and it will just effect that, not the whole thing globally.
It also had a problem with portrait images breaking the whole format of the gallery. Same if you have a long caption to display. All of a sudden things no longer stack correctly and it looks like garbage.
After that I tried this one using tables:
It does work and her code to do it is here. There is one caveat though. For whatever reason, it doesn't seem to work to just plug in the image link <img src=" "> directly yourself. I may have made the mistake of switching between Compose Mode and HTML Mode, but I don't think so. For me this method of using the Insert Image from Blog would have meant scrolling through the hundreds of photos I've posted in 7 years to find what I want. Not really an optimal use of my time. So because of this I didn't use it.
What I did learn from this, in an almost throw away remark, was that you should never switch back to Compose Mode after you have been coding your gallery in HTML mode. I learned the hard way that it completely breaks what you were doing and copying and pasting the code into a new HTML window will not save it. I had to do it a second time from scratch.
What I ended up using was a Dynamic Drive gallery from here.

I'll try to show you step by step what I did in pictures and then, if I have time, follow it up with a short video.
Step 1 - Find the url of your images and copy them
All of my images were already on my blog.
So I went through my blog archive and located the posts with the pictures in them and did Right Click > Copy link Address on each one and then pasted them into a Page in HTML Mode.

These pages never have to be published, I just save them as drafts to hold the information. Now we have the URL's of the images we want in our gallery.
Step 2 - Grab the CSS and HTML and put it in another page
Now we'll create our gallery page. We will select HTML Mode, and we will fight the urge to look at it in Compose Mode. If you do, it will irretrievably ruin your work. You can see what the base of the gallery looks like in Preview, but the Mouse Over function will not show. I just kept on publishing and updating to look at mine.

I put the CSS in the top of the page, followed by the HTML that was going to hold the image url's.

Step 3 - Create the right number of images and paste URL's
By copying and pasting the parts of code for each pair in the gallery you can get the number you need for your pictures. You may want to take this opportunity to mess with the width="#px" height="#px" before you do. The numbers they have in there work for the images they used. I settled on 100px by 75px as it is a standard TV 1.33:1 ratio and seemed to look fairly normal for the thumbnails. For portrait just switch the values. Again you may have to adjust for each one if your cropping is not consistent. Mine isn't.

You want to paste the same image URL in both <img src=" "> tags the first one is the thumbnail and you've set the size with your width= and height= values. The one inside the <span> you need to set by slightly changing the URL.

In the URL there will be a section, near the end, that says /s1600/. This is the blogger size designation. s200 is small, s400 is medium, s800 is large and s1600 is original size, I think. Suffice it to say you can control the size of the mousover window by changing the s#00 value. I ended up tweaking it to s500 as I felt that gave me the best overall size.

I almost forgot to point out. After the second <img src=" "> there is a space to add your caption between the <br /> and </span> tags. If you lifted the code directly it already has something typed there. You'll see it when you go live.
Step 4 - Tweak the code to your liking
As already noted I adjusted the thumbnail size in the HTML and the mouseover image size in the URL for each image. I also adjusted a couple of things in the CSS.
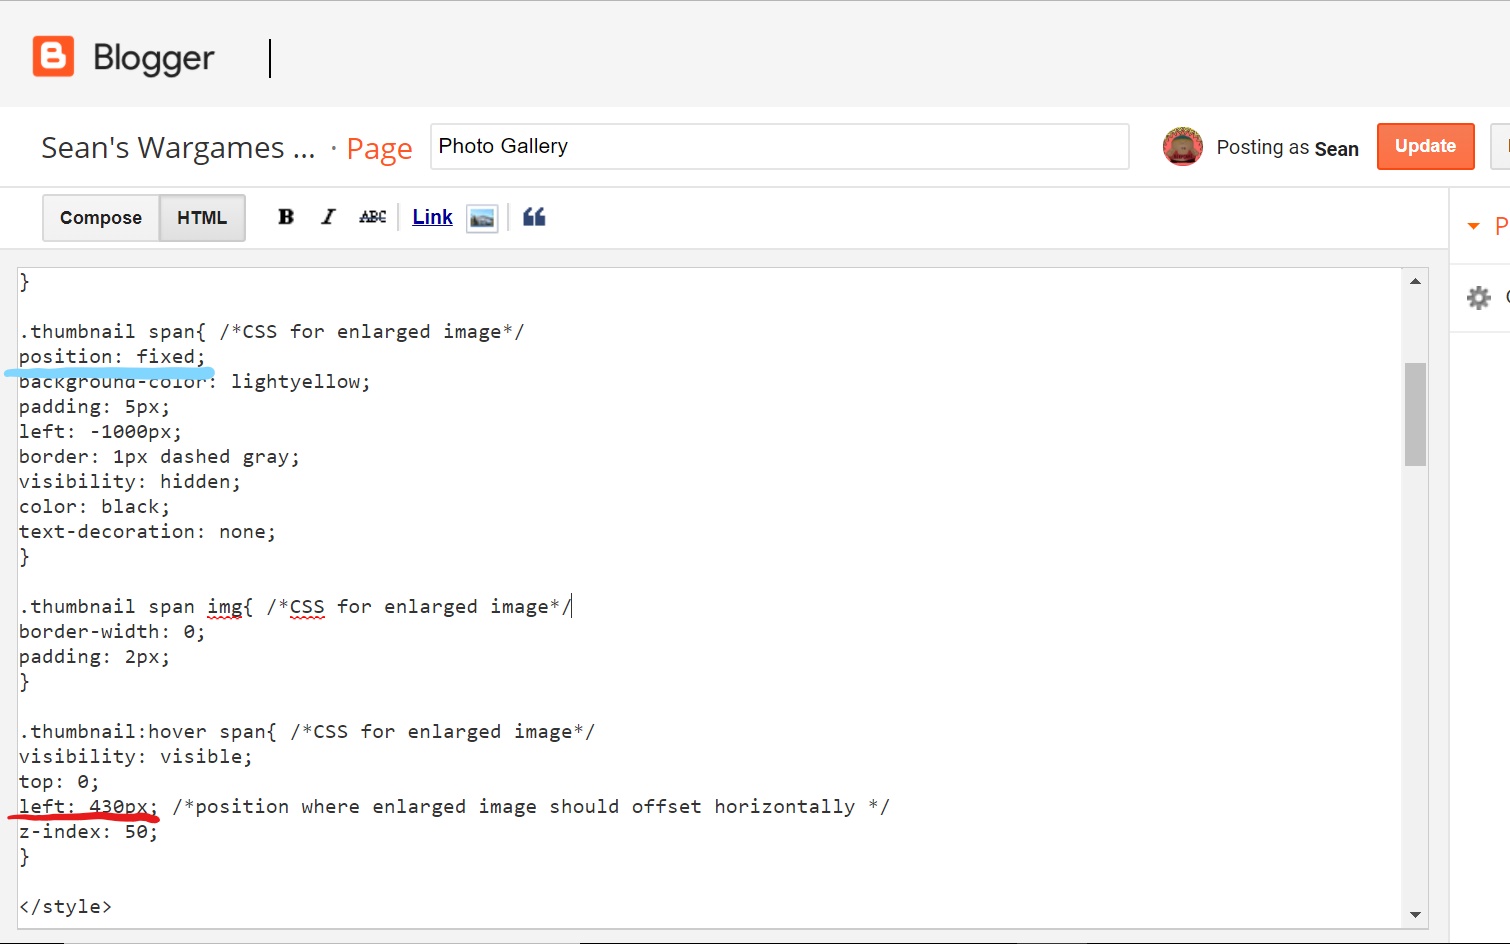
In the .thumbnail span I changed position: absolute to position: fixed so that it would stay at the top of the window as you scrolled down. I changed the .thumbnail:hover span left: 230px to left: 430px because that worked better for my blog to position the container. I tried to change the top: 0px value, but that never worked so I gave up on that.

The last little bit I did was to make a dummy row of code and comment it out using <!-- and --> to hide it from view. Now I have a snippet to easily copy and paste for the next album.
Step 5 - Add headings or text to your gallery
This is what totally messed up my gallery and caused me to have to redo it. I was looking for the HTML code for headings. I'll save you the trouble. Heading <h2>, sub heading <h3>, minor heading <h4> and normal <div>. remember you always have to have a close tag </ > for whatever you have on open tag for. You'll notice that I made my 2017 heading bold by adding the <b> </b> tag.

There you have it.
I'll hold off on doing a video. Honestly I'm fried after writing this and I should be painting.
Very interesting Sean and I shall look forward to the follow-up tutorial? I'm using such an old version of layout, it might be easier to just load them into a blank page using the 'small' size option on the image up-loader pop-up, but it's not something I'm thinking of right now, but in the future . . . maybe,; lots of spare images!
ReplyDeleteH
Hi Hugh. Uploading them all to a page or blog post and using blogger's built in lightbox is a perfectly legitimate way to do it. I'm not sure if you can get them to display in a grid that way though. The one I used was a compromise. I would have preferred the Xomisse, but it wouldn't work right for me.
DeleteAbsolutely, that's why I thought do the on the smallest option and you'd get three or four per 'line' depending on portrait or landscape numbers per row, it wouldn't look neat or pretty, but it'd 'do' for 'parking' them!!!
DeleteH
You know what I did that was way easier than thought? I just bought some server space with an account that had happened software installed out of the box and came with a domain name 😉
ReplyDeleteHi Andrew, there are plenty of services, software and even apps that could accomplish that. This is just one way I found and thought it might be helpful for some if I showed where the stumbling blocks are for doing it this way. In the end it's about showing your work the way you want to.
DeleteWell done mate. Sounds like a lot of effort but rewarding when it works.
ReplyDelete